IMO (Indigenous Microorganisms)
Indigenous microorganisms, IMO, have been purifying the air, soil, and water for millennia. They have adapted to survive in mutual benefit with each other and help reprocess the old into new. If it was not for these organisms, we would be overcome with waste and pollution. They break it down to make it safe and usable for all other living creatures.
Collecting microorganisms (microbes) from the environment is a great way to build up living soil in no time. It is not difficult and only requires a few items. The main down side is that it will take a few weeks to fully prepare.
Microbes may be cultured at any time of the year; however, avoid wet, rainy seasons. Excessive moisture in the environment promotes growth of fungi that are less desirable for the intended uses.
The collection process takes approximately 4–5 days in cooler weather ( 60°-70°F ) and 3–4 days in warmer conditions ( 70°-80°F ).
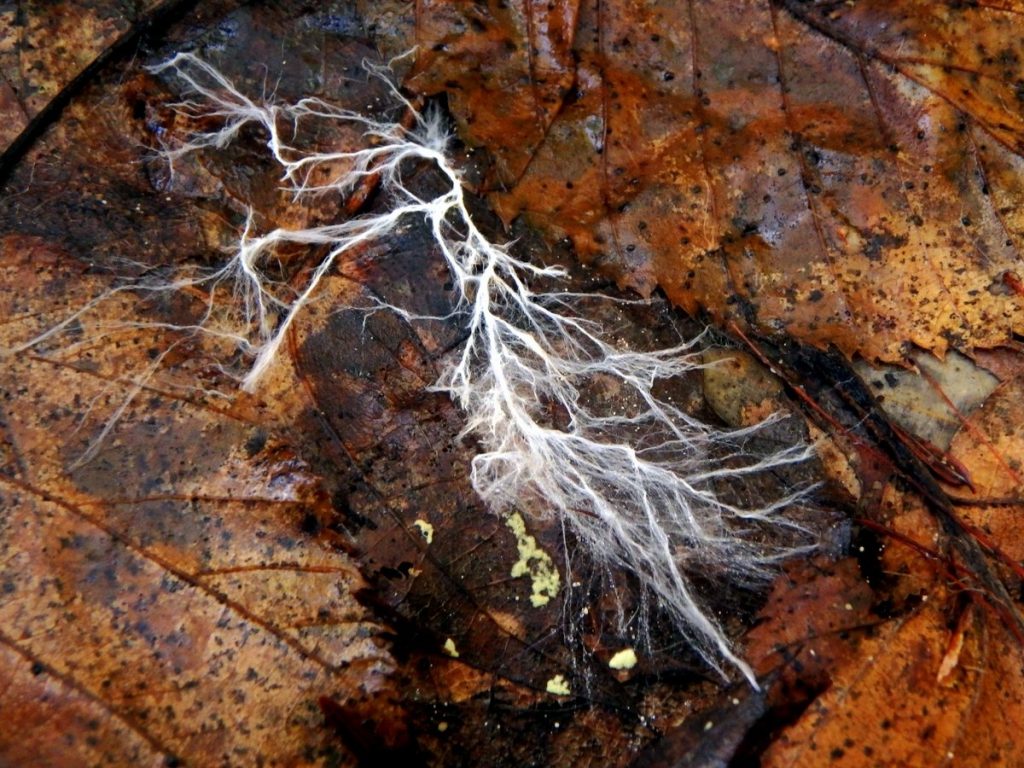
Beneficial microbes are highly concentrated under undisturbed forests or other vegetated areas. Combining microbes collected from multiple sites will likely result in a more robust culture.
It is possible to collect your native material and bring it indoors for culturing. All of the other directions will apply except that you will not need a cage to keep out animals, or maybe you will.
Collection materials:
• A small wooden box, 12 x 12 x 4 inches deep with a lid and preferably made of cedar.
• Steamed white rice
• A sheet of clear plastic, large enough to completely cover the wooden box.
• 1⁄4 inch mesh wire screen or cage large enough to completely cover the wooden box.
If you are culturing indoors, first collect your native material from chosen undisturbed areas and put it in a suitable breathable container to bring back.
Place a thin layer of clean wood mulch on the bottom of your wood box or shotgun chamber. Add your IMO collection to an equal amount of cooked rice and mix together well. Spread your IMO mixture over the top of the mulch and cover it with a lid. Keep in a warm dark place for 3-5 days. ( 60°-70°F )
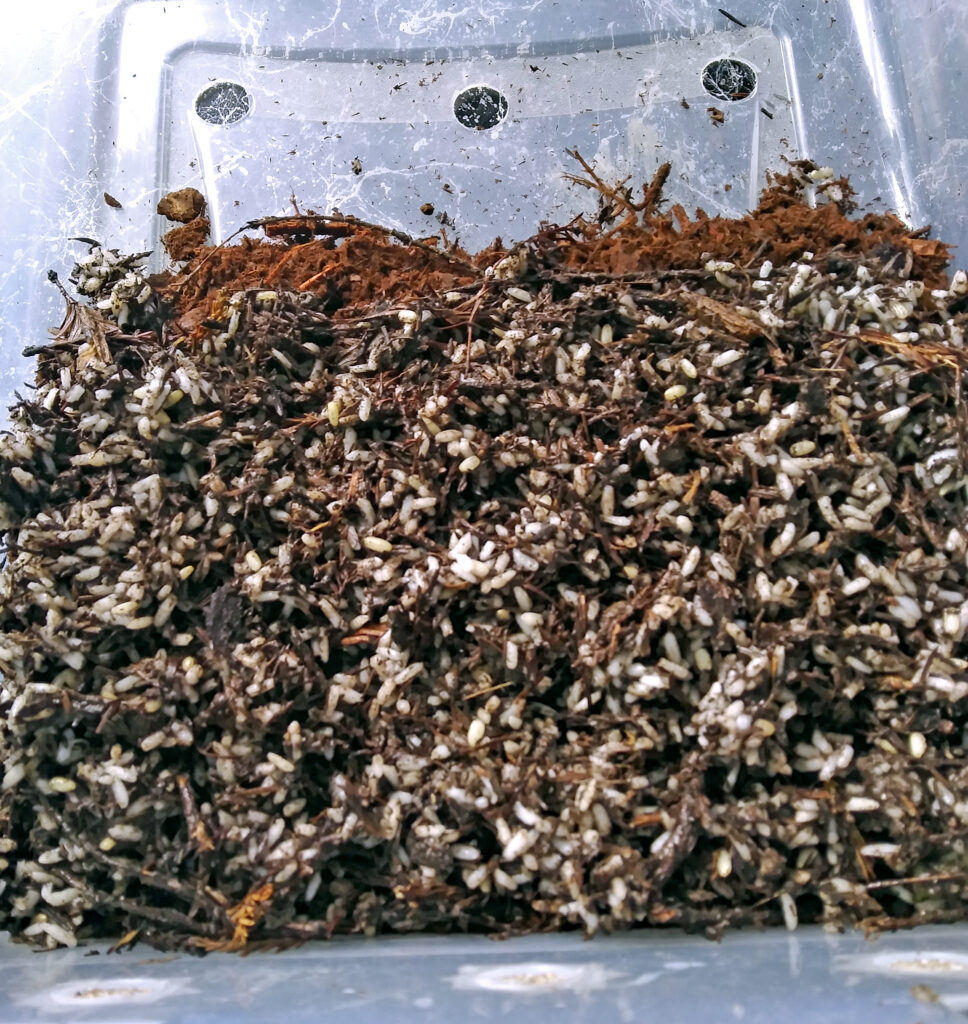
If collecting outdoors, fill the wooden box with 3 inches of steamed rice and cover the box with a lid.
There should be an inch or so of air space between the rice and the lid.
Place the box under trees or in another secluded area that has good life in the soil.
The box should not be in direct sunlight. Partially bury the box in the soil. It should be buried at least 2 inches deep for best results. Cover the box with fallen leaves from same location.
Cover the top of the box with wire screen or a cage to prevent animals from tampering with the rice.
Top the wire with a sheet of clear plastic to protect the box from rain. Anchor the plastic sheet on all sides with small rocks to prevent it from being dislodged by wind.
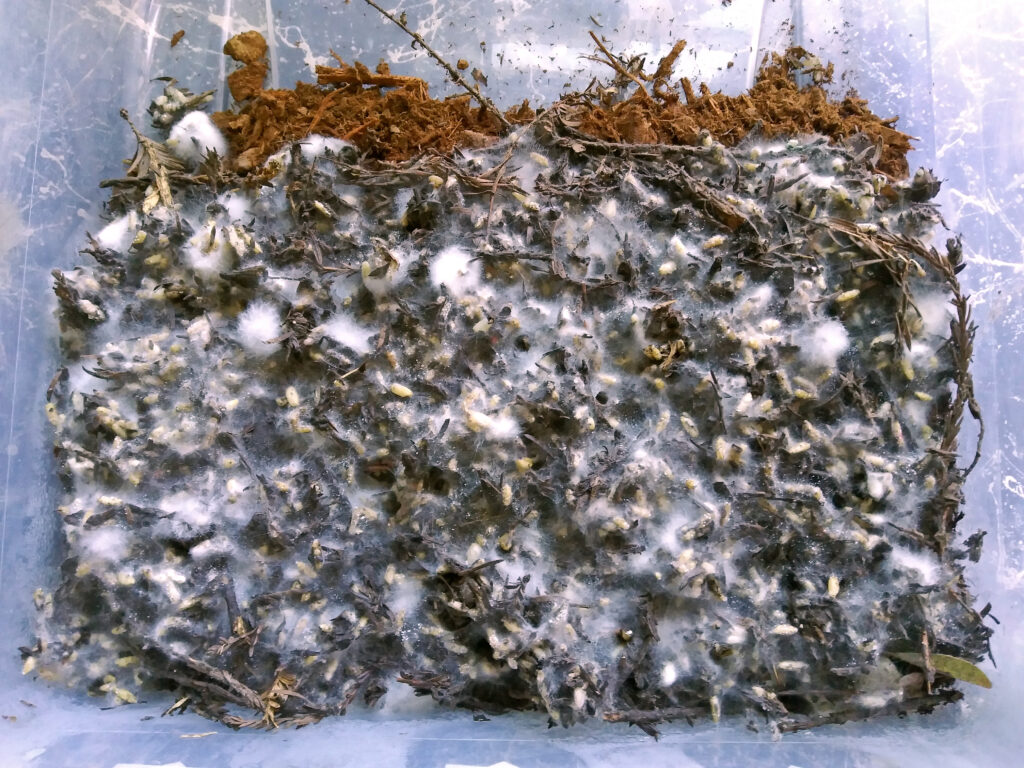
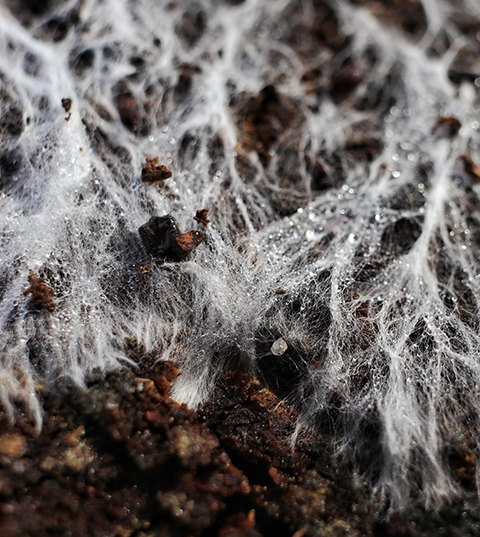
Leave the box undisturbed for a minimum of 4–5 days. After that time, check to see if the moist rice is covered with white mold. If mold growth is sparse, re-cover the box and wait an additional 2–3 days before re-checking. If the mold is a color other than white (other colors indicate growth of less effective fungi) or if rain has entered the box, the contents should be discarded and the process repeated.
Once the desired microbes have been collected, the next step is to increase their numbers.
The basic supplies for microbe culturing:
• 1 part IMO Collection
• 1 part Garden Soil
• 1 part Wheat Mill Run or Rice Hulls
• Large Tarp or Cover
Working in a shaded area that is ( 60°-70°F ), place wheat mill run, rice hulls, or similar substrate on a dry dirt floor, in a pile, or place into a large wood box or shotgun chamber. Concrete is not a good idea because it will cause issues.
Water mixture:
• 1 gallon of dechlorinated water
• 2 tsp ACV
• 1 tsp DHN
Mix water well and add water mixture to the mix a little at a time. Continue mixing until it is of a semi-moist but not too wet consistency (roughly 65%–70% moisture), standard field capacity.
Cover with a tarp loosely to keep in moisture. Allow the microbes to propagate for 7 days.
Periodically examine the external surface for white mold growth.
Monitor internal temperature with a composting thermometer so as not to exceed 120°F. You can also just feel it with your hand to make sure that it is not getting too hot.
If its getting hot, turn it.
Turn the pile with a shovel after 24 hours and a minimum of three to four times during the week to keep fermentation even and temperatures from getting too high.
When the fermentation process is finished, internal temperature will stabilize, indicating culturing is finished.
The next step is to expand the culture further. Mix the IMO half and half with garden soil.
Use the same process as above with the same mixture of water.
Mix to field capacity and cover loosly. Let sit for 7 days.
After 7 days, the finished IMO is now ready for use. The sky is the limit as it can be used to inoculate just about anything.
Awesome!